
Spot metering, EV , "a" zone system, and a water bath.
- temporallightimages
- Jul 3, 2021
- 5 min read
This post is prompted by a discussion ensuing with members of Dave's Pinhole Camera World Tour 2021 (now extended into 2022) about light meters and the realisation ....I might be alone in the way I use them.
After a useful discussion on our "forum" I came to realise that using exposure values to determine my exposures and development may be something I do which is not common, but I am sure is not completely unheard of ...surely?
I gave a quick and dirty explanation and said I would write something more detailed and here it is with an example and my thinking behind it ....and a punt I took which I am still not sure had any effect but have stuck with.
What is an exposure value ? Well, it's merely a way of expressing the level of light in an area or of a subject and easily translating this to a "correct" exposure to use and also for sheet film particularly, a method of developing the film. The EV of a subject is directly affected by the ISO set on the meter so this needs to be correct before you start (for example measuring an area as EV 10 at ISO 100, and then switching to ISO 400 and measuring the same thing will yield an EV of 12 ....two stops different and the ISO is 2 stops faster so ...as expected)
Reading across this comparison of 2 EV readings , EV 10 would be F8 at 1/15 and EV 12 would be F8 at 1/60. So the film at ISO 400 is 2 stops faster and needs 2 stops less exposure to be "correct".
I really hope you are following me so far !
Ok, so a real world example :
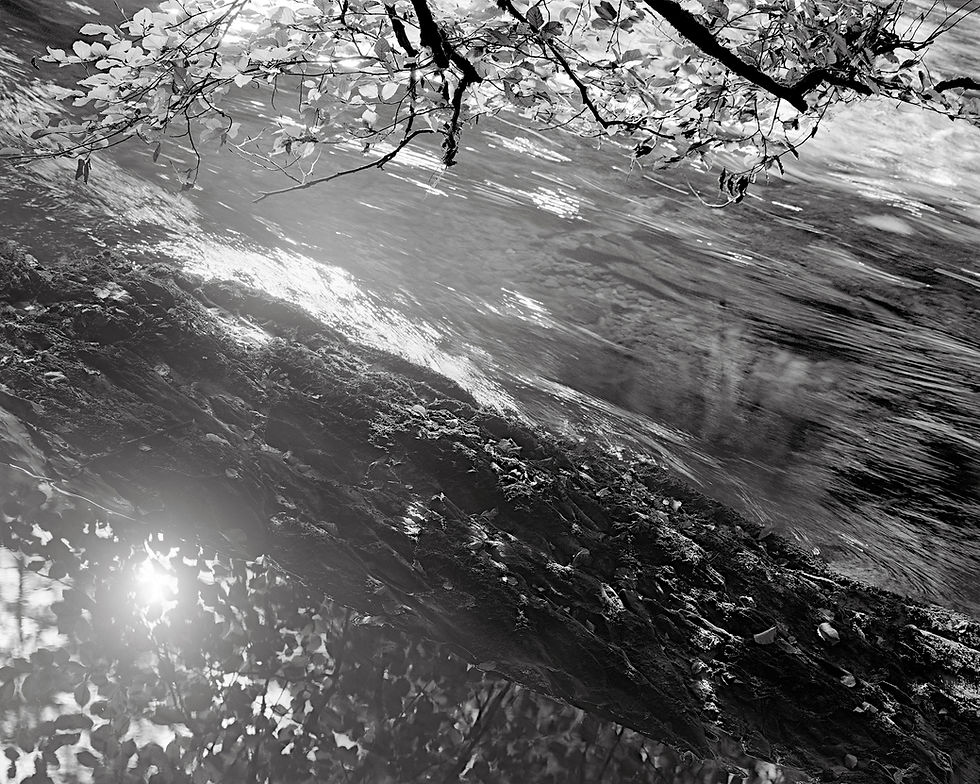
I made this image 18 months a go, it was the first sheet I ever developed in a tray and I did that because I had a very precise requirement for what I wanted to see in the negative. Specifically my measurements led me to believe I could not get all the detail I wanted but I was definitely going to give it a go. Why not ? This is photography and experimenting is part of the process. I should point out that nothing I did was new, but the result of reading and thinking about what I had read and applying it to my predicament.
I use a 1 degree spot meter to take readings of the scene and I do this using EV as explained above. Predominantly I make my exposure based on the shadow regions (or the darkest parts of the image where I want true detail to be seen), and then depending on where that puts the highlights of the scene (the lightest points of the scene where I want true detail) I can amend the development of the negative to control where these highlights fit into the scale of greys ( i.e. push them higher with extended development or pull them lower with reduced development.)
Example

The exposure / zone dial.
The item below is a home made zone system wheel which helps me to determine the correct exposure and to also see where various parts of the scene will fall on the scale of greys. It also helps me to see when I need to change development of the negative away from "normal". I have had this very item for 20 years or so and it is invaluable to me !

The wheel shown above was how I first determined the exposure. Placing the lowest value of 8 on zone III it was clear that I would lose highlight detail at the initially indicated an exposure of F45 at 2 seconds. I wanted to show the dappled light on the pool in the foreground so had to risk losing a bit of shadow detail in order to do this .....but I had a plan.
I would reduce the exposure by a stop and place the dark shadow on zone II which would risk losing it but the rock that I measured at EV 9 was more important and would now be placed on Zone III. The highlights were still too high to get real detail in them so a reduced development was required and I would use an N-2 development to reduce them by a possible 2 stops (or 2 levels of grey on the wheel).

The purple markings show what I hoped to get with the reduced development of the negative. Reduced development affects the highlights far more than the mid-tones and the shadows, as (roughly) shown above.

The final piece of the jigsaw for me was an attempt to give the shadows more development than the highlights and I had read that using water as a stop bath may allow that to an extent. The thinking being that taking the negative out of the developer and placing into a tray of water stops the development more slowly than using an acid stop bath , which is to all intents and purposes more or less instantaneous as it neutralises the developer which is an alkaline solution.
The theory also says that in the highlights (the dense parts of the negative) the developer is more exhausted than in the shadows as the developer is being used up quickly in the highlights. Submerging the negative in water dilutes the developer and as there is less left in the highlights , this area dilutes quicker and the highlights stop developing before the shadows do........in theory !
As mentioned earlier this was the first time I had developed in trays as I had always used a tank to develop 6 negatives at a time prior to this, but with this negative and 3 others I had differing development times for each one. I worked out a time of 5:15 for this negative to be in the developing solution and it was the last of the 4 to go into the solution. It was followed by 4 minutes in the water bath and then fixing. Once dry, I was completely happy with the negative which surpassed my hopes and to this day remains one of the best I have made.

This is the negative snapped by iPhone when hanging to dry and the image has only recently been finished as I often leave them a long time! The image will be posted onto the website when I get the time to do it !
For the pinhole shots I have been talking about over the last 2 weeks b.t.w. , I measured the important shadows, placed on zone 3 , exposed as is and reduced the development "a bit" to take care of the increase in contrast caused by reciprocity. By and large though, I let them take care of themselves as I had no idea what to expect really. I will be posting part 3 of my time with the camera over the next week and it will be my final installment as the camera has gone onto the next photographer now.
I am making 4 of these zone wheels tomorrow but 2 are promised to get sent on, one will be my "spare" and 1 is up for grabs !
Thanks for reading !


In Steve Anchell's Darkroom Cookbook, he discusses water vs stop bath, and it is clear he feels water is a better option.
So, after #DPCWT2021 Part 3 we can expect “N- Developing“ next? Dave
As one of the lucky ones promised an EV wheel I'm looking forward to playing with this and learning a new approach to metering. It really does lend itself well to 5x4 sheet film too especially with regards to pulling development. Thanks mate!